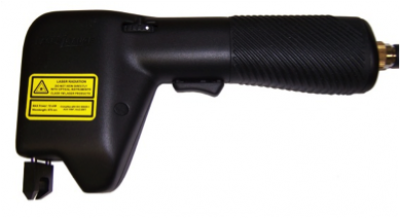
The HS410 provides the best resolution of the controller based sensors and is used to inspect and measure small features such as pitting, scratches, gouges, small radii, and laser welds. It has a 0.250” field-of-view and an expanded depth-of-focus of 0.125”. The sensor requires the graphical feedback of an LG1102 or LG1200 controller.
Scanning Resolution – With a 0.250” field-of-view (FOV), the HS410 has a horizontal scanning resolution of 0.0005”. The vertical or depth accuracy is ± 0.00025” (6mm).
Depth-of-Focus (DOF) – The sensor has a DOF range of 0.125” during a single scan. Surface features that are within ± 0.0625” of the optimum DOF are within focus and are profiled. The entire DOF range can be moved 0.100” towards or away from the surface by rotating a thumb wheel, thus creating a potential range of focus of over 0.3”. Being able to move the DOF range can bring previously inaccessible surface features into view.
Operator Feedback – Three LED’s located on the top of the sensor provide feedback on scanning errors and can be used to signal the acquisition of a good scan. The LED’s also indicate out-of-focus conditions.
Standoffs – The standoff on the HS410 is removable and can be replaced with a different design based on the requirements of the application.
Controller – Features measured with the HS410 are small, so the real-time plots displayed on either the LG1102 or LG1200 controllers are essential to accurately positioning the laser stripe over the feature. An operator can watch the movement of the feature on the controller’s display and adjust the position of the sensor accordingly. Messages are displayed on the controller instructing the user to move the thumb wheel in one direction or the other to bring the feature into focus. Once the feature appears on the display, the user releases the sensor trigger and the measurements are calculated and displayed in a data table.
Resolution – A horizontal scanning resolution of 0.0005” and a depth accuracy of 0.00025” assures accurate and repeatable measurements to within 0.001 of an inch on shallow features such pitting, corrosion and scratches.
Portable – The HS410 sensor used with the battery-powered LG1200 controller creates a truly portable system capable of measuring the smallest of features. Inspections can be made in the repair shop, in the plant, on the flight-line, or wherever the part is located. Parts do not have to be transported to a central location for inspection.